How To Screenshot MAC Half Screen
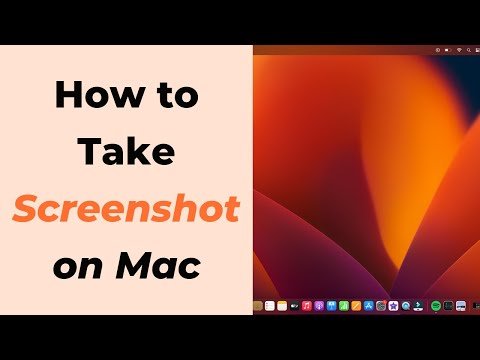
Taking partial screenshots on a Mac can be incredibly useful, especially when you need to focus on specific details, share precise information, or create visually appealing presentations. This article provides a detailed guide on how to screenshot Mac half screen using keyboard shortcuts, built-in tools, and advanced techniques. Whether you’re using a MacBook Air, MacBook Pro, or other macOS devices, this step-by-step guide ensures clarity and ease.
Why Learn to Screenshot Mac Half Screen?
Screenshots are a powerful tool for communication, whether you’re capturing part of a webpage, annotating a document, or creating tutorials. Knowing how to screenshot Mac half screen not only improves efficiency but also allows you to present information neatly and accurately.
How to Screenshot Mac Half Screen with Keyboard
Using Shift-Command-4 Shortcut
The most efficient way to capture part of your Mac screen is by using the Shift-Command-4 shortcut. This method lets you select any portion of the screen, including half of it.
Steps to Screenshot Mac Half Screen:
- Press Shift-Command-4:
- This transforms your cursor into a crosshair tool.
- Drag to Highlight Half the Screen:
- Click and hold your mouse or trackpad, then drag to cover half the screen.
- Release to Capture:
- Let go of the mouse or trackpad. The selected screenshot will save directly to your desktop.
Pro Tip:
- If you need to reposition the selection, press and hold the Space Bar while dragging the selection box. This locks the size and shape, allowing you to adjust its position.
Advanced Options for Mac Screenshots
Capture a Specific Window
Want to capture just one application window without including unnecessary elements? Use this technique:
- Press Shift-Command-4.
- Press and Release the Space Bar:
- Your cursor will turn into a camera icon.
- Hover Over the Desired Window:
- Click to take a screenshot of the selected window.
Output: This method creates a polished image of the window with a subtle drop shadow, perfect for presentations or sharing.
Adjust Edges for Precision
Mac allows fine-tuning of your selection area after initiating a screenshot:
- Hold the Shift Key:
- After dragging to select an area, press the Shift key to lock one edge while adjusting the other.
- Toggle Between Edges:
- Release the Shift key and press it again to switch between adjusting vertical and horizontal edges.
How to Crop a Screenshot on Mac
If your captured screenshot includes unnecessary elements, you can crop it without the need for third-party tools. Follow these steps:
- Open the Screenshot in Preview:
- Double-click the image to open it in the default Preview app.
- Use the Selection Tool:
- Click on the Markup Toolbar and select the rectangular selection tool.
- Crop the Image:
- Drag to select the area you want to keep, then choose Tools > Crop.
Result: A refined image focusing only on the desired content.
Screenshot on MacBook Air: Differences and Tips
Whether you’re using a MacBook Air, MacBook Pro, or an iMac, the screenshot process remains largely the same. However, MacBook Air users often prefer lightweight tools for quick editing, such as Preview or third-party apps like Skitch.
Quick Editing Features for MacBook Air:
- Markup Toolbar: Allows adding annotations, text, and shapes to screenshots.
- Preview App: Provides basic editing and cropping tools.
Where Do Screenshots Go on Mac?
By default, screenshots are saved to the desktop as PNG files. If you’re unsure where your screenshots are stored or want to change the default location:
- Check Default Save Location:
- Captures are named Screenshot [date] at [time] and appear on your desktop.
- Change the Save Location:
- Press Shift-Command-5 to open the screenshot toolbar.
- Click Options, then select a new folder to save your screenshots.
Tip: Create a dedicated folder to organize your captures neatly.
How to Paste Screenshot on Mac
Pasting screenshots directly into documents or apps can save time. Here’s how:
- Copy Screenshot to Clipboard:
- After taking a screenshot, hold down the Control key before releasing the mouse or trackpad.
- The screenshot will copy to your clipboard instead of saving to the desktop.
- Paste Into an App:
- Open the desired app (e.g., Pages, Word, or an email client).
- Use Command + V to paste the screenshot.
How to Screen Record on Mac
Sometimes, screenshots may not suffice, and you might need to record your screen instead. Here’s how to screen record on a Mac:
- Press Shift-Command-5:
- This opens the screenshot toolbar, which includes screen recording options.
- Select Recording Area:
- Click the Record Selected Portion button and drag to define the area.
- Start Recording:
- Click Record to begin. A small stop button will appear in the menu bar.
- Stop Recording:
- Click the stop button in the menu bar to end the recording.
Output: The recording is saved to your desktop.
MacBook Screenshot Shortcut: Complete Overview
Here’s a handy reference for all Mac screenshot shortcuts:
| Action | Shortcut | Description |
| Capture Entire Screen | Shift-Command-3 | Saves a full-screen screenshot to the desktop. |
| Capture Selected Area | Shift-Command-4 | Lets you select a specific portion of the screen. |
| Capture a Window | Shift-Command-4, then Space | Captures an individual window with a drop shadow. |
| Open Screenshot Toolbar | Shift-Command-5 | Provides additional capture and recording options. |
| Copy Screenshot to Clipboard | Add Control key | Copies the screenshot directly to the clipboard for easy pasting. |
Tips to Enhance Your Screenshot Workflow
1. Use Third-Party Apps
While macOS offers robust screenshot tools, third-party apps like Snagit and Lightshot can provide advanced features like annotation, editing, and cloud storage.
2. Organize Your Screenshots
- Regularly move captures into folders based on projects or categories to maintain organization.
- Automate file organization using tools like Hazel.
3. Annotate for Clarity
Use the Markup Toolbar in Preview to highlight critical areas, add arrows, or write captions for better communication.
Conclusion
Knowing how to screenshot Mac half screen is an essential skill for professionals and everyday users. By mastering shortcuts, understanding advanced features, and leveraging built-in tools, you can enhance your productivity and create better visual content. Whether you’re working on a MacBook Air, editing screenshots, or even screen recording, these tips ensure seamless execution every time.


